? This document provides a guide to creating an Apple Developer Account. It outlines the steps necessary to set up an account as either an individual or an organization and provides information on the prerequisites for organization enrollment. The document also includes a section on joining the Apple Developer Program, as well as instructions for giving FrontRow access to the account.
Steps to Set up an Apple Developer Account:
You will need:
- Apple ID Account with Two-factor Authentication
- Apple Device*:* iPhone/iPad/Mac (borrow one or buy a refurbished device)
Account Types: Individual & Organization
- Apple requires you to enroll based on the type of business you own.
- Use your Business Registration to help determine how to enroll.
- Enrolling in the wrong Account Type will delay your apps.
- If needed, you can convert from an Individual developer account to an Organization by contacting Apple with your business and tax information (more information found here)
>Sole Proprietorship, Single-Person Company: Enroll as INDIVIDUAL
>Corporation; Partnership; Limited Liability Company: Enroll as ORGANIZATION
1: Individual Account: For a Single User (USE ORG ACCT)
- Your name will be displayed under the app name on the App Store.
- Developer Resources must not be shared with other users.
- Adding Members/Users is not permitted. It's akin to giving access to your private account.
- You'll provide FrontRow with your Apple ID Login DetailsApple ID
- For apps focusing on finance, healthcare, or other strictly regulated areas, an individual account isn't suitable according to Apple's standards. However, if the content is primarily educational, exceptions may apply. Consider using an organizational account for apps with regulated content.
2: Organization Account: For Teams and Multiple Members (USE THIS ONE)
- The name of your company or brand will be showcased beneath the app name in the App Store.
- Developer Resources can be shared, allowing the creation, uploading, and publishing of apps.
- Team Members, such as FrontRow, can be added by sending them an invitation to join the account.
- Each team member will have a unique login and will only see a limited set of your information.
- For apps that feature content related to finance, healthcare, or other areas under strict regulation, an organization account is mandated as per Apple's policies.
Prerequisites for Organization Enrollment:
- Website: This should be publicly accessible; its domain should resonate with your company's name.
- Legal Entity Status: The company should have the legal status to enter agreements.
- Legal Entity Name: The name of your company should match the associated Tax ID.
- Legal Binding Authority: The person enrolling should have the requisite authority to endorse contracts.
- DUNS Number: This is utilized to verify the legal status of the entity. The application is straightforward, with more information available here.
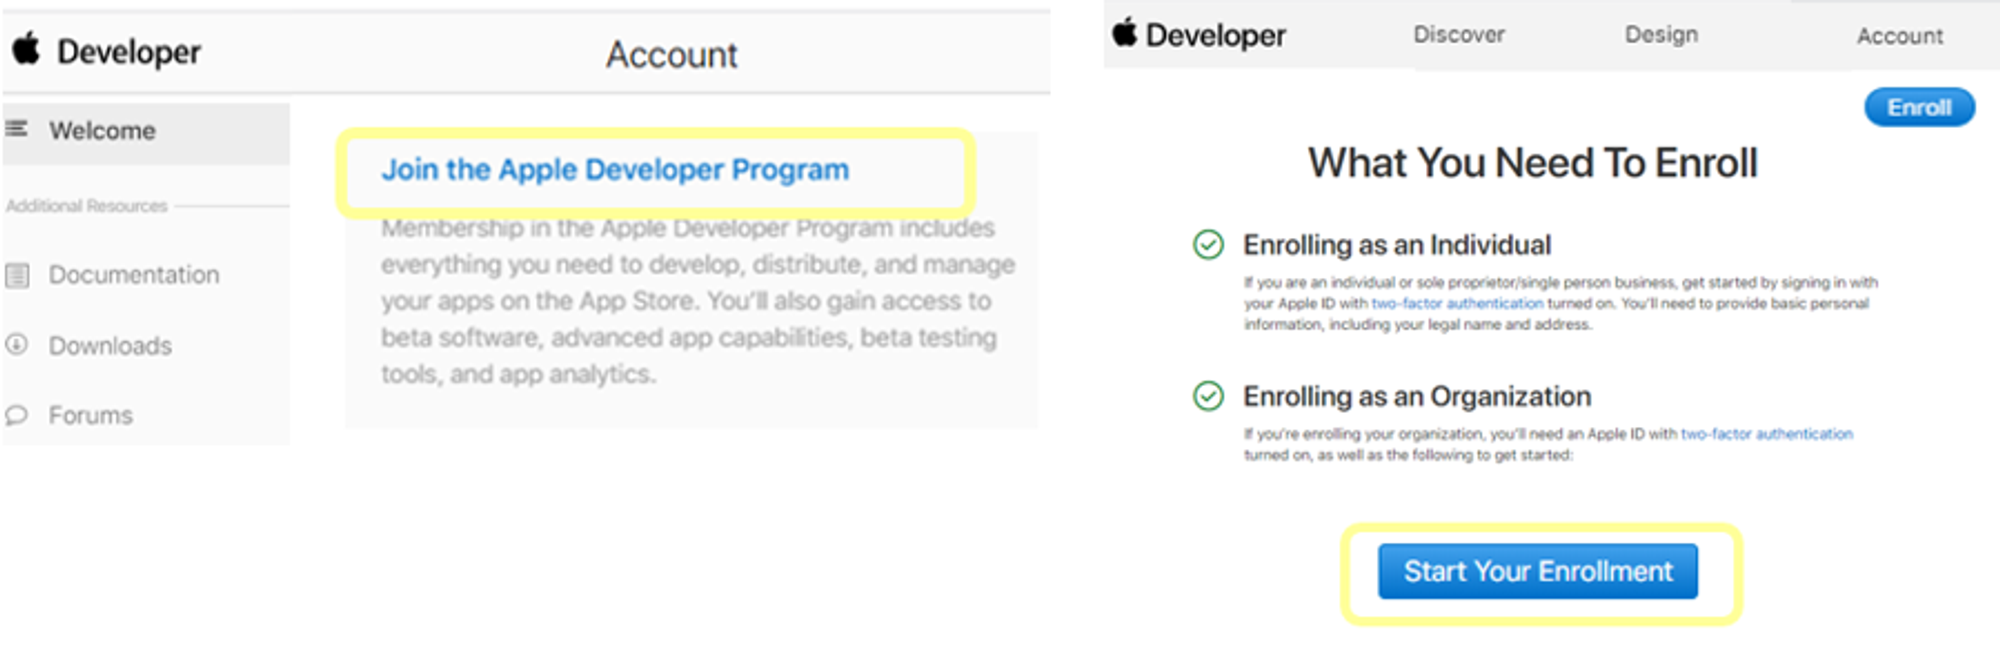
Section 1: Joining the Apple Developer Program
1: Set Up Account (no cost): Visit Apple Developer > select Account > Sign-In with your Apple ID.
2: Enrollment Process ($99/yr): Press Join Apple Developer Program > choose Enroll > initiate Start Enrollment.
3: Determine Entity Type:
- Individual: Agree to the terms, then finalize membership purchase. Enrollment is now complete.
- Organization: Input your company details, followed by submitting your application.
(You might be asked to agree to terms and/or finalize membership immediately or post-approval.)
4: Await Confirmation: Apple conducts verification and subsequently emails you with one of the following updates:
Enrollment Approved; More Information Required; Issues Found.
5: Upon Approval: Sign in at Apple Developer and then proceed to App Store Connect.
Section 2: Give FrontRow Access- Add New User
- App Store Connect >Users & Access >Add (+) >Enter Information >Invite.
Name: FrontRow App
Email: dev@frontrow.cc
Role: Admin (enables access to Resources)

Was this article helpful?
That’s Great!
Thank you for your feedback
Sorry! We couldn't be helpful
Thank you for your feedback
Feedback sent
We appreciate your effort and will try to fix the article